5. Experimental Apps (Unsupported)
To start a Jupyter notebook with a GPU
Either: Visit the dashboard at:
or
After logging in:
- Choose Jupyter from 'Pinned Apps'
or
- Click 'My Interactive Sessions' in the main menu along the top, choose Jupyter from the left pane
Example screenshot:
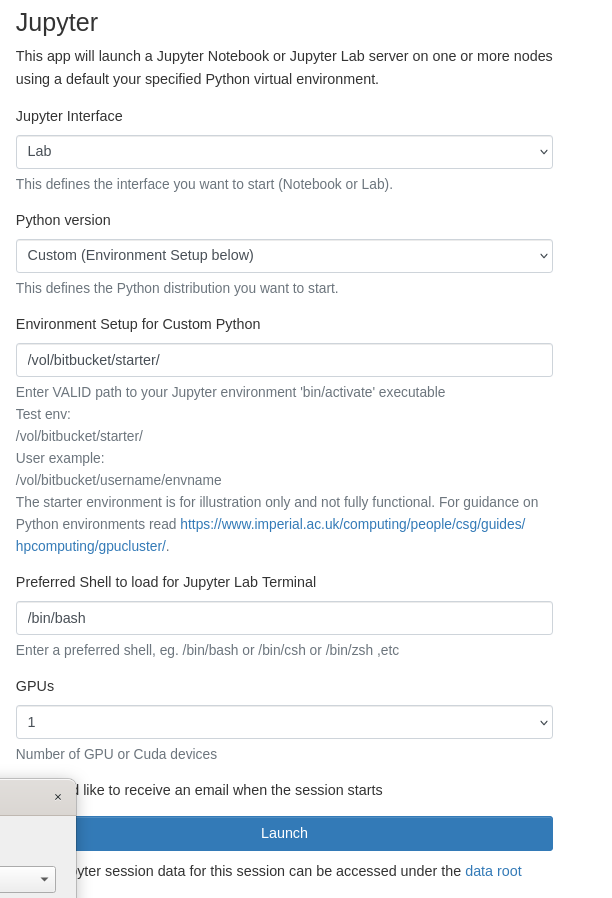 |
|---|
Edit the options where required, a functioning python environment is required, so make sure you have run these commands or similar on a lab PC:
https://www.imperial.ac.uk/computing/people/csg/guides/python/virtual-environment/
mkdir /vol/bitbucket/$USER
export PENV=/vol/bitbucket/${USER}/myenv
python3 -m virtualenv $PENV
## Install jupyter notebook dependencies
pip install jupyter jupyter-lab notebook
Jupyter Interface
- choose Notebook or Lab
Environment Setup for Custom Python
- enter the correct path to the created environment, eg:
/vol/bitbucket/${USER}/myenv
If the path is not correct or valid, the default read-only env /vol/bitbucket/starter is loaded
Preferred Shell
- Leave as default or change to a different value, make sure the shell executable is valid, eg.
/bin/bash or /bin/csh or /bin/zsh
To receive email notifications of job start and completion, tick the box next to:
'I would like to receive an email when the session starts'
When you have chosen appropriate options:
- Press Launch
After a short wait, you will have a notebook job in the queue that will last for 4 days.
 |
|---|
Optionally, ssh directly using a Terminal or use VSCode to connect, the hostname is listed in the job details as above
eg.
ssh username@hostname.doc.ic.ac.uk